iOS Today 740 Transcript
Please be advised this transcript is AI-generated and may not be word for word. Time codes refer to the approximate times in the ad-supported version of the show.
00:00 - Mikah Sargent (Host)
Coming up on iOS Today, rosemary Orchard and I, micah Sargent, talk about editing photos on your phone. Stay tuned for this episode of iOS Today Podcasts you love From people you trust. This is Twit. This is iOS Today, with Rosemary Orchard and me, micah Sargent, Episode 740, recorded Tuesday February 11th 2025, for Thursday February 20th 2025. Photo editing on iOS. Hello and welcome to iOS Today, the show where we talk all things iOS TVOS, watchos, homepodos, ipados and all the OSs that Apple has to offer. This is the show where we help you make the most of your Apple devices by telling you what you can do with those devices. I am one of your hosts. My name is Micah Sargent.
01:01 - Rosemary Orchard (Host)
And I am another host, I am Rosemary Orchard, saying things the same way Micah said because that seemed like a good idea at the time.
01:10 - Mikah Sargent (Host)
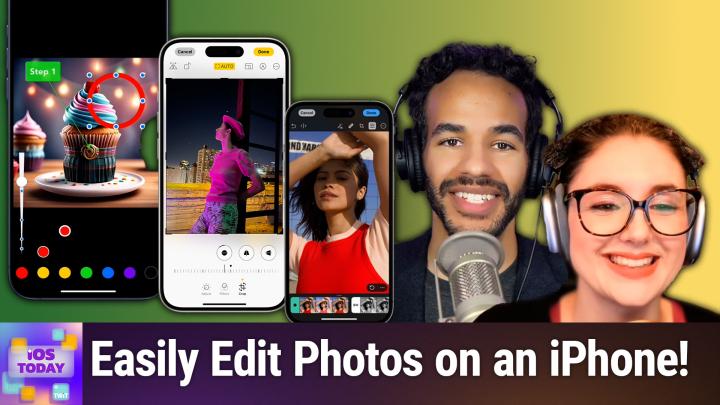
Yes, today we are covering, I think, a really important topic that kind of in some ways, falls by the wayside, because it's just one that people kind of you know they do all the time. That's photo editing, and there are many different ways to pull off photo editing on our iOS devices, our iPadOS devices, and plenty of built-in ways to edit photos, plenty of third-party ways to edit photos. So we're going to take a look at that today. First and foremost, let's talk about simply using your actual built-in options for editing photos and videos, because I think there are some tools and options that people don't realize you actually have.
01:59
One of those off the jump I found to be kind of powerful is the built-in video editing tools, like the option to mirror a video, rotate a video, crop a video or trim a video, where in the before times, one would have to open it up in a video editing program and let that video take forever to export. That is something that I think is really cool that iOS is able to do very quickly. It doesn't involve a whole lot of extra stuff. You can simply open a video in your Photos app, make a quick change to it and move on from there without much extra work. So I'll show you really quickly here with this video that I have.
02:51
So this is currently a 16 by nine video. I'm able to adjust it by maybe changing the color and the exposure. I can add a filter to it, but this crop option again allows me to flip the video or rotate the exposure. I can add a filter to it, but this crop option again allows me to flip the video or rotate the video. I can change the aspect ratio of the video, I can crop the video and very quickly all of that can be done and exported without needing to wait for something like Final Cut Pro, you know, to finish exporting, and I think that's something that is really quite magical, that I've certainly seen people take for granted, and it gives me one of those back in my day moments where I'm going. You have no idea how long that used to take to be able to do. But of course, you can also edit your photos in the same way. Rosemary, do you want to talk a little bit about photo editing with the built-in Photos app on iOS?
03:52 - Rosemary Orchard (Host)
Yes, sure. So the first thing to know, of course, if you're going to do any photo editing, is you need a photo, and so you can from the actual camera on your phone. Once you've taken a picture, just tap on it straight away and go down into editing, or you can do this from the Photos app itself. Whatever floats your boat, you're all good. And to start with, before we even get started on actual editing editing and this is just a picture of my keyboard that I took just now you can start with live pictures in the top left if you have live photos turned on. Personally, I would always recommend leaving live photos turned on. It enables a whole bunch of extra cool things. But you can then change your live photo to a loop. So if you've got a dog who's bouncing around, for example, then it would just loop it infinitely, which is quite cool. There's bounce, so if something's going from left to right, then it would go from left to right, to left to right, to left to right, and just bounce back and forth. And then there's also long exposure, and this can be quite useful if you're taking a picture of somebody in front of, say, an object. So say, for example, I went to New York with Micah and I took a picture of him in front of the Statue of Liberty. There are probably a lot of people around, right? I'm sure you're familiar with the Statue of Liberty, fairly famous landmark. It's going to have a lot of people. If you use long exposure and Micah stays still and the Statue of Liberty stays still that last one's pretty much a given Then you can basically blur out the other people in the background and that's quite nice, and then you can also turn off the live photo entirely, should you want to.
05:31
Now I'm going to leave that on because I don't know about you, micah, but I'm always taking pictures and I always manage to get it so that there's one person blinking. I don't know how, but there's somebody's blinking, like it just happens. So there's a picture and it's like it's a great picture, but their eyes are closed like this. It's like no, what, what, what, what did I do? Well, this is the advantage of taking a live photo. So if you tap on the uh edit option, which is uh, I'll just cancel out of this a second at the bottom it's the uh one with the lines with little circles on it, um, and then you tap on Live, then you can actually go through and choose the right frame.
06:08
Now, fortunately for me, my keyboard does have its eyes open, but the eye key is mostly missing. But if I go back here, there we go. I've now got the eye key in there and because I left it on there, it's given me the option to tap on that to make that the key photo. So there we go, the eye on the keyboard is visible, it's got his eyes open and I can also turn off audio here, because live photos are like miniature videos. They have audio in as well, which sometimes is great. Sometimes there's a hot dog vendor yelling get your hot dogs here, which is not necessarily what you want to send to your grandma. So you could turn that audio off as well if you don't necessarily want that.
06:47
And then we have the other options down here. So we have styles. So if I wanted to make this into a sort of vibrant mood or natural or luminous, dramatic, et cetera, then there's a whole bunch of color options and even if you take your picture using one of these styles, you can always pop it back to standard. And then, if you tap on one of those styles, then you can actually, you know, move a little bubble around inside of a square, which will then affect things like the tone and the color, depending on exactly what it is. And if you they're going, okay, but I can't seem to get back to the middle, it should snap back. But if, like me, you snap back and you're like, okay, but the tone says 0, 5 and the color says 0, 10 or says 10 at the top, you can tap on a little undo button right there, um, to uh, set that all the way back to normal, which is great. Um, then we've got adjustments so we can do auto adjustments, which if you tap on it, then it turns it on and if you tap on it again, it turns it off.
07:52
You can tap on the exposure option so you could increase and decrease your exposure, et cetera, and I'm not going to walk through all of these because there's just so many, but I would recommend having a little play around, and this can be great, especially if you're photographing something to sell online and the colors are a bit off. Um, throw a piece of paper in there that's white and then you like in the corner, then you can use that to sort out the brightness and then we can move on to the next tool and we can go. Okay, I'm now just going to crop out that bit of paper that I had right over in the corner, so that I don't have to see that anymore. Now when you're cropping, there is a couple of options at the top for flipping and rotating as well. There's also an auto button which will straighten your picture for you. But to the right of the auto button it looks like a landscape piece of paper with other pieces of paper sort of folded inside of it, and this can be really useful if you are trying to resize your picture to say, a square, or you can freeform it or you can size it to the original size, but you can say actually, no, I want a landscape at the original ratio, thank you. And then there's also specifically resizing it to be a wallpaper 9x16s, 4x5s and so on all of which is just quite nice. And again, if you want to at any point change what you've done or undo things, you can tap cancel. And then the last option is cleanup, which is the one that uses Apple intelligence and so on, and this should magically clean up this picture Once I, for example, select a little area.
09:33
There was a little clip over the bottom right corner of my keyboard. That is now gone, ta-da, and I don't know, maybe I can clean up the shadow in here. I'm not sure how well it's going to do, but let's see. Try again with a small area. What if I just do the bit on the back button? That didn't quite work, but I wasn't hugely expecting that to work. But there we go.
09:54
And then sometimes you take a picture because you're trying to explain something to somebody. Well, don't forget about markup tools. Markup tools are great. They're fabulous on screenshots, they're fabulous with photos. If, for example, I got a message from my grandmother asking me where the semicolon key was, then I could add a shape to this and I'm going to add a little rounded rectangle and I'm going to change the first bubble on this to no fill, and then I'll change the second one to a lovely pink and I'm going to increase the thickness of this. So the outside is going to be, say, 25 points, and then I can just drag this and resize it to do whatever it is that I need. You can change text settings on it, you can change the opacity of it if you need to. You can duplicate it.
10:45
So if you're trying to show somebody where two things are, then you can show them where, say the up-down arrows are, and then of course, there's extra options as well, and so I can say I am done there with my markup and my photo editing and save that, and then I'm just going to take another picture right here and then I'll tap onto that in the bottom left, but then I'll go back and then I will use the triple dots, which I should have thought about this first, so I'll just recrop this a second to save that.
11:19
But then I can tap and I can copy and then I can go over here and then I have the option which not showing up right now because I have been messing with my phone but you can paste edits. So if you've made edits to one particular photo and you're like, okay, this is good, I fixed the white balance on this and I'm trying to sell you know these things off on eBay or I'm listing them on Depop or whatever it is, and so I know that this is right now because that piece of paper that was white that I left in the corner is white in my phone Then you can copy your edits and paste onto all the other images as well, and that is something that's really handy to remember.
11:57 - Mikah Sargent (Host)
Nice. All right, there are loads of different ways to go about editing photos, and we kind of Rosemary and I were both inspired by some of the third party tools that we like to use. I've talked about this tool a lot in the past, and it's one that, to this day, I continue to recommend any chance I get, because of how powerful it is and how much you are able to do with it, where you might not even realize that there's a tool out there that does a thing that you want it to do. Specifically, the tool that I like to use is one called Annotable. That's A-N-N-O-T-A-B-L-E, and Annotable is think of like Annotate and then Able. It is an app that has an in-app purchase to be able to unlock all of the tools. So bear that in mind. It's a $10 one-time purchase to get all of the tools that are included. But what's great about it is I think you'll be amazed at how mindful the developer has been about what you would want to do when you are creating annotations for a specific document or image. So let's take a look at what it looks like in iOS.
13:26
So this is a notable open, and right now there's not a whole lot going on, but if I tap in the bottom right hand corner, I can see the different tools that are available to me. There's a crop tool up at the top so I can change. You know how the image is shown. There's a loop tool, which of course is one of my favorite tools. So if you're trying to call out a portion, you can tap your finger onto the screen and kind of hold it down and then move to create a magnification loop and then in the bottom left-hand corner, that's where you can change settings for the tool. So by tapping on the bottom left-hand corner, I can change the color of the stroke around the outside of the loop. I can change the size of the stroke by dragging up or down on the bar on the left. I can change the magnification level to 2x, 3x or 4x and I can choose a custom color for the stroke. Now you'll notice there are two blue circles with white circles around with a white stroke around the outside. Those are, of course, your kind of control points. The one on the outside of the circle lets you change the size of the loop, but what I love is the one in the middle lets you change where the loop is looking. So if I take this circle and move it off to the side and tap and hold in the middle and then drag. Suddenly I have a kind of point that becomes available to me. Now there's something unique about a notable that I love, and for those of you who are watching, you will probably see that when I am tapping and holding right above my finger, wherever I'm tapping and holding, a little magnification object appears, and what that is doing is it's giving me a look at what is beneath my finger at any given time, and this works across the entirety of the app. So, regardless of what tool I'm using, I'm always able it gets out of the way of basically where my fingertip is, where I would normally not be able to see, and it's that that makes I think this app so delightful. So that's the loop tool. Let me show you, well, let me delete that loop magnification.
15:46
Next we have the redaction tool. Well, actually, no, this is more like the shadow tool, so I can kind of highlight a portion of the image. I've got a circle, a square, or I can draw and say, hey, I only want you to pay attention to this part, right, and I can tap to remove that if I don't want it. The next part is the redaction tool. I can draw redaction to color out a part, and what's great is, if we highlight that, we can change the type of redaction that it is. It can just be color. It can be a sort of like a polygonal option. We can do hexagonal Is that hex? I think that's hex. We can do square pixels and you can change the size of the pixels to make it even more, or the size of the mosaic, essentially to make it even more difficult to see what's beneath it, and blur as well. So we'll delete that.
16:43
Next are our text tools. There's a redaction tool, there's a highlighter tool, there's a text tool and there's a text highlight tool. Redaction, of course, will put a thick line over the top of any text that you have on screen. The highlighter tool is just using your finger to color, to highlight something, but it has the multiply property added to it so that it doesn't cover up the text when it's highlighting. The text tool lets you add text, and what's great about that is that when you add text, hello, you can also use this in the same way that we do with the loop tool. So we could point to something on the screen as well, and you could call this for example, if you had a screenshot and you're trying to show somebody what they need to do, we could call it step one instead, and so then they would be able to know okay, this is what you press for step one. And then the last part, the text highlight tool, actually uses computer vision, sort of an OCR, text recognition, character recognition, to let you highlight text that is discovered on like in a screenshot. So instead of just kind of highlighting willy nilly, it lets you highlight text specifically. Next are your kind of line tools so you can draw a line, you can draw an arrow, and then finally you have your your shape tool so I can circle something on the screen. And again, with this I can change the size of the stroke, I can change the color, I can decide if it itself has a stroke around the outside or if it's flat, and then use that to circle something on the page.
18:33
This tool works both independently but also as a share sheet option. So if you have a screenshot, you tap on the share sheet, you say a notable. It'll pop open that photo in a notable and you'll be able to do that there. You can also do it while you're in the photos app as well. I think this app is amazing, and it's actually one of my first downloads anytime I get a. If I'm and it's actually one of my first downloads anytime I get a you know, if I'm restarting over from scratch with my phone, I make use of this tool heavily. All right, rosemary, I'm excited to hear about what's next for you, because this is what I think inspired this episode.
19:09 - Rosemary Orchard (Host)
Topic Well, there are a couple of apps which I have on my list and, you know, one of the things that I do fairly frequently is I take screenshots of things that I need to share, or I might, for example, if I am looking at something, go and take a couple of screenshots and want to stick them all together, which is a little tricky to do at times. So I have found a great app for this which I've been using for years. It is called pixo. So I have just opened pixo. I took a bunch of screenshots, um, and it's intelligent enough to have figured out. Okay, there is a gap between me taking a screenshot of the screen off to the left of my home screen versus me opening the tips up and taking some screenshots there. So it's grabbed those and look at that. It's automatically stitched them together. But not only has it done that, what I can also do is go into tools and I have my settings set. So automatically cleans out the status bar. That is the area at the top. So it changes the time to 941,. Make sure my signal is full, my Wi-Fi is full and the battery is full, because if you share a screenshot on the internet, folks, and your battery is at like 17% or something, all of the messages will just be charge your phone, even though you probably plugged it in immediately afterwards. So yeah, I always clean up the status bar and I've also cleaned up the scroll bar. So if I undo this, then folks who are watching who are a little eagle-eyed may see on the right-hand side there's a very faint gray bar. It's not showing up super well in video, but I promised you in person it's actually there, but I can just have that removed. So that is gone.
20:52
Now there are a bunch of other things that I can do here as well, very similar to Annotable or Notable, where I can blur something out to make it unreadable or in various different ways, which is very handy. I can also select an area and just blur that entire area with one particular way of styling. I can add text if I want to. I can highlight something, an area, and just blur that entire area. With one particular way of styling. I can add text if I want to. I can highlight something, so I'll try the yellow to rather sorry doodle on things. And then I also have the option to add various frames, including like borders between images, which in this case because it's a scrolling screenshot. I don't want those borders, but sometimes if you're sticking two pictures next to each other which is something else I use Pixo for even if it's not able to stick them together in a way that scrolls, you can still use it to line up images. It's quite nice. And then there's the option to add a little watermark as well. So I've got a little purple iOS today. That's just appeared at the bottom, or I can have it layered all over the image, but then I can also add a device frame, and this is really handy if you are taking pictures and you're trying to make like a little tutorial document.
22:08
Now, obviously, this iPhone it's a long phone because I've taken all of those screenshots and it's stuck them together, but it also works with Apple Watch and it can detect what device the screenshot is from as well, so it will know if it's an Apple Watch Series 10 versus an Apple Watch Ultra and it will automatically select the right kind of device frames for you, which is really handy. And you can also even color the background if you want to. I always save these out as PNGs so they don't have the background, but that's up to you and one of the things that I love about this. Ok, so I took a number of screenshots here and it stuck them all together. If I tap Save, it gives me the option to delete the other four pictures. So I am coalescing those four screenshots down into one image in my photo library, which, for me, is excellent. So I will definitely do that.
23:03
Now I have two other images here which I took and I'm going to stitch these together horizontally and that's it. That's all I need to do. I can choose to move something in or out, but if I just want to stick a couple of pictures together, it's a really handy way of doing that. I can do this with shortcuts and I am a shortcuts nerd, so you're probably there going, rose, why aren't you doing this with shortcuts? I know I can do this with shortcuts, but I don't necessarily want to do it with shortcuts all the time. So it's just nice to have these things as options. And, yeah, I love Pixel. I definitely recommend going into the Settings and having a little play around.
23:43
So the export I've set my export format to PNG and, yeah, you can specify what extension. I've set it. Always use the largest dimensions available, please. I want full-size screenshots. Do I want the want the original creation date installed when I'm editing these pictures, so it'll use the, the time stamp from that first screenshot that you've taken. Um, and do I want to automatically delete the source images? It will always prompt you, but do I want it to do that? Yes, I personally do watermark. What do I want my watermark to default to and how do I want it to look, et cetera, and I can turn these features on and off. I can even save things out as PDFs. You can choose what paper size you would like to use and whether or not various settings and so on should be preserved. There's also smart recognition, which you can turn on and off for auto stitching your recent scroll shots. Um, and then that is also where I've turned on automatically removing the scroll bar in the status bar.
24:42
Um, but yeah, I really love uh pixel. It is a great app. It is uh free to download, and then there are some limitations on the free app and they did uh change to a subscription model a while ago, but honestly, I found that it's worth it for me. Um, or actually, no, sorry, I uh, I tell a lie. It is not a subscription model, it is a 199 in-app purchase. Um, I was mixing it up with something else, so it's it's so affordable. I definitely recommend it.
25:12
I use it all the time for just a huge number of things, um, and yeah, it it's just really lovely and, um, yeah, cheap, easy, easy to use and it works, which is great, um, but if you have, uh, maybe over time, not been so great at cleaning out your photos, uh, then the folks behind setup at macpaw actually have a really great app, um, which used to be called gemini on iphone, but obviously now google has an ai platform called gemini, um, and they also expanded what the app can do, uh, so there is now a great app called clean my phone from setup, um, which, among other things, will allow you to find very similar shots.
25:56
So maybe you were trying to take a picture of, say, a statue when you're visiting somewhere, but people kept walking into frame, or you were trying to line everything up and it was a bit cold and windy or something, so you have six or seven photos of the same thing. Well, it can help you find those, identify them and clean them up. It can delete duplicates and it can also go through and help clear up some extra clutter and so on on your device, but I know as much as photos are amazing. Editing photos is fabulous Sometimes. Sometimes you end up with just a few too many pictures, especially if a lot of them are the same. It's worth going through and having a bit of a clear out every once in a while.
26:37 - Mikah Sargent (Host)
I agree, yeah, you, just you, you, you, you can get up, you can pick up that cruft, right, and you're going. Oh right, I forgot about this and this and this and this and this and also this and oh and this. No, that doesn't need to be there. Um, all right, there are, of course, many, many, many, many tools that are out there, but I think that one of the arguably best third-party tools that exists across iPadOS, iOS and macOS is are sort of, I guess, Pixelmator and Photomator incredible apps that are incredibly powerful and are part of my daily toolkit for sure. Do you want to tell us a little bit about Pixelmator?
27:30 - Rosemary Orchard (Host)
Yeah, so Pixelmator is an iPhone app and an iPad app that you can download. It is $4.99 and it is basically Photoshop on your phone. So I have here two screenshots that I took yesterday and I just added a little arrow to annotate them. And I wanted to do this in Pixelmator because it was really easy to do. But what I can do is I can tap out and I can create an image. So there's a whole bunch of settings for new documents where you can create things with particular sizing and so on.
28:01
Or you can select to open a photo, so say, for example, I've got a screenshot there and so I can open that, and then you can do all the things you would expect to do, and it's quite nice to be able to stick another picture on top of something or add shapes and text. You also have the option to add layers, so I can add, for example, if I wanted to add a black layer. Or I can add, say, a purple layer which looks suspiciously like my iPhone background. I swear, folks, that is not actually my iPhone background, it just looks like it. But yes, there you go, I'll add like it. But yes, there we go, I'll add something a little different. And there we go, I can delete that one. And yeah, there's just so many things that you can do with this app, including. It's got, for example, all the blending modes for layers. So if you, for example, want to superimpose a weird slightly abstract chevron design over a screenshot of an iphone this is obviously a really bad example, but that's exactly what I'm doing here then I can do that and I've got all of the options to do like the weird uh, you know, lightening things, or doing, um, you know, color dodge, or just doing it as like an overlay, or vivid colors, etc. Just inverting things, all of that stuff. You know it's got the power to do that.
29:28
And I think one of the things that we do frequently forget is our iPhone is more powerful than the computers that were used to put people on the moon. You know, we're literally carrying super technology in our pockets. So I feel like we should take advantage of that every once in a while. And remember, even though this is a very small device, this app seems like a small app. It's only $4.99.
29:52
I paid once, like a decade ago, and I have separately bought Pixelmator for Mac and then I bought Pixelmator Pro for Mac, which is a separate application.
30:02
That's $50 one-time purchase and, yeah, I just find that this is a really great app for being able to do more advanced things than you can necessarily do in photos, and also it's quite useful if you want to play with layers and things like that, which maybe you're used to from other editing applications.
30:23
There's also the option to have guides, so if I, for example, add a shape, and I'm going to add a green circle for Micah, it automatically puts it in the middle, but I can choose to snap it to the top and the middle of the top, or snap it to the bottom and the middle of the top, or snap it to the bottom and the middle of the bottom, or even put it over on the right, but vertically, horizontally centered, and I just find that this is the sort of thing that makes it really easy to just quickly edit one of these images. Now, it is worth noting, apple have recently acquired Pixelmator, so this is Pixelmator. There's also Pixelmator, which is a photo editor available for iPad, but the apps are going to be around for quite a while and if you haven't got them yet, maybe go have a look, because I personally think that Pixelmator, photomator, which is the photo editor for iPad and also Pixelmator Pro for Mac, are genuinely fabulous applications and really good value for money.
31:25 - Mikah Sargent (Host)
Absolutely. I agree wholeheartedly. The team is constantly working on improvements and updates, and I think that that really sets that app apart or those apps that set of apps apart and regularly making sure that new things that are available are also able to take advantage of the system. All right, if you out there have apps that you like to use to edit photos that you think deserve bare mentioning, please do email us iostodayatwittv. We always love to hear from you. With that, though, I think no, yeah, so for sure I can hear that music. It's time for Shortcuts Corner. This is Shortcuts Corner, the part of the show where you write in with your shortcuts requests and Rosemary Orchard, our shortcuts expert, provides a response. This week's Shortcuts Corner request comes in from Lauren, who writes Hi, I recently traveled from the US to London for a vacation.
32:36
I arranged for internet access and things worked just fine, except one problem. I was receiving texts from friends and family and the messages were showing up as being from their number, not from them, but not everyone, just some people. I tracked it down to the country code. The contacts that were working right had the country code of plus one at the beginning of the number and my contacts the ones that weren't working. I just had the area code and number. I guess that when I am home in the States the plus one isn't there on the incoming messages. So the number matches my contacts and if there is a plus one the phone is smart enough to figure it out. But when I was in the UK, all texts from the US came with the prepended plus one, but if that wasn't in the contact it wasn't a match. I was able to resolve the issue for the few people I was texting by editing their contact to add the plus one.
33:29
But I would like to clean up my contacts going forward, which brings me to the question Could we make a shortcut, either to run on my phone or my Mac? That would search my contacts, look at every phone number and, if there isn't a country code, append plus one to the beginning. I don't know when this will come up again, but it seemed a handy thing to do. Of course I'll add the country code to all my new contacts going forward, but that doesn't help me with my existing 3,400 contacts, 3,000 of which are on iCloud and 400 of which are on Google. Lauren, that's of course Lauren signing Lauren's name, and then, of course, lauren says much thanks for the great show and your consideration. And for Pet Tax, here is Pippa. Oh, my goodness, the floofiest cat I have seen on this show yet. Wow.
34:17 - Rosemary Orchard (Host)
I feel like Pippa is judging me and is like sitting there waiting to see if I can do this or not well, you solve this problem or not. You better figure it out yes, exactly, and you know what. It's gonna be a bit of a challenge, but don't worry, pippa, and don't worry lauren, I've got you for this, um.
34:34
So the first thing that I'm gonna note is you did say you have 3,400 contacts. Now you can run a shortcut over potentially 3,400 contacts and have it not crash, but I would personally recommend doing this in batches, and so, to that end, I have in the shortcut I made earlier which is my very best Bluekeater moment from the UK, where here's one I made earlier I have put in a number variable to start with. I've set it to 100, and I've set our limit on the find contacts action to have that limit just because otherwise you could be locking up your device for quite a while, especially if you run this on an iPhone, would be good to run it on Mac, ideally, because it's obviously got more power and you can run shortcuts in the background more easily. But either way, this is what we need to do to make sure that we don't crash and burn everything. So, starting with a find context action after that. So I'm going to find all contacts where all of the following is true.
35:42
So the phone numbers numbers plural, and this is quite important to note a contact can have more than one phone number. Ok, so we're checking where phone numbers does not contain plus one, and this is a little bit tricky because you can't just check an individual phone number from here and your phone numbers are not nothing. Okay, now, I'm not sorting by anything. You may want to sort by things and to do the nothing. I added a little nothing action at the top and then I've just put that nothing in there as a variable. So now we've got contacts where they've got phone numbers and it's not just plus 1. And then we are going to repeat with each contact, then we're going to get the phone numbers from that contact and then, because there could be more than one, we need to repeat with each phone number. And so then what I've done is I've said, hey, if it begins with a plus 1, and then I've just kind of skipped the actual if statement there and I've gone straight into the otherwise. So if it doesn't begin with plus one because doesn't begin with is not an option that you can use for your if statement I could have done some fancy matching with regular expressions or something, but I wanted to keep this so that you know people can actually understand what I'm talking about without having to go and learn a subset of a programming language. So if it doesn't begin with plus 1,. Ok, I've put a text section. I put plus 1, followed by, and then I need to make sure here that that is indeed our second phone number. So that is from our repeat index 2. And then what we need to do and this is where it gets a little finicky so we have to remove the phone number from the contact and then we have to add the phone number back to the contact with the same label. Okay, and that's what I have done. So if it doesn't start with a plus one, then it removes the phone number and then adds the phone number back with a plus one and then it makes sure that it uses the same label as well. So if it was using the label work, that is using the label work again, and that's it. It is quite complex and I would say I put this number in as 100.
37:54
Please test this first and maybe just run it over one contact and have a look. And, as always, if you are going to be doing a large amount of bulk editing with these things, please back up your contacts first. I do not want to be responsible if everything goes horribly wrong, but this should work to go through. The problem is you can't edit a phone number on a contact, so you do have to remove the phone number from the contact and then add the phone number back. And if the shortcut crashes between removing the phone number and adding the phone number, then your contact could lose their phone numbers. You could swap these two actions around, but that's still going to be a little bit finicky.
38:39
So I would highly recommend using those export features the ability to back up your data and getting all those contacts out, just in case something goes horribly wrong and then by all means run the shortcut, have a look and see if it does exactly what you're expecting it to. So for me, I did this, and I had to do this with plus four four because that's the international dialing code for the UK and the vast majority of my contacts are UK contacts. So, yeah, when I ran it with plus four four, it worked perfectly. But yeah, obviously I'm in a different location to you. So yeah, hopefully this gets off your problem, lauren, and thank you for the challenge, and hopefully Pippa does not find me lacking with the solution that I've got here, but I'll make sure that we share the link in the show notes.
39:28 - Mikah Sargent (Host)
See, that's the thing is. I think a lot of people would go well, you can't edit a phone number, okay, this just doesn't work. But Rosemary Orchard doesn't stop there. She says okay, you can't edit a phone number, but you can remove it and add in a new one. That's really just the same one, and that's what I love about what you do, rosemary. Fantastic work, lauren. Thanks for writing in. If you have Shortcuts, corner requests, ios today at twittv is how you get in touch. That brings us nearly to the end of this episode. I do want to remind everybody out there about Club Twit at twittv slash club twit. For just $7 a month you can get ad-free episodes of all of our shows. You can get access to the TwitPlus bonus feed that has extra content you won't find anywhere else Behind the scenes before the show. After the show, special Club Twit events get published there. Access to the members-only Discord server a fun place to go to chat with your fellow Club Twit members and also those of us here at.
40:34
Twit and that warm, fuzzy feeling, knowing that you're helping to support the work that we do here on the network. We are currently offering, for a limited time, a two week free trial. So if you've yet to check out Club Twit, now's the time to do it. Twittv slash Club Twit. And for those of you who are already members who would like to earn months of Club Twit for free, head to Twittv slash Club Twit slash referral, because you can refer your friends and earn those free months.
40:55
Rosemary Orchard, if people would like to stay up to date with what you're doing, where should they go to do so?
41:01 - Rosemary Orchard (Host)
well, the best place to go is rosemary orchardcom, which has got links to apps, books, podcasts, um, and, of course, all the social media sites uh, where you can find me but you can also find me hanging out in that club to a discord, uh, where we have a really cool chat room. Uh, where people can post things about ios today and the episodes and ask questions and support each other and everything, which is lovely. Plus, if you happen to be around while we're recording live, then, yeah, there's a live stream right in the Discord and sometimes people submit great questions while we're recording, which can add to the show, which is really lovely. Micah, where can folks find you?
41:33 - Mikah Sargent (Host)
If you're looking to follow me online, I'm at Micah Sargent on many, a social media network where you can add to chihuahuacoffee that's C-H-I-H-U-A-H-U-Acoffee, where I've got links to the places I'm most active online. Thanks so much for tuning into this week's episode of iOS Today. We appreciate each and every one of you and we thank you for writing in with your questions and suggestions. We'll be back next week with another episode of iOS Today, but until then, it is time to say buh-bye.